Projects in a Rustic Workshop
There are several ways to encounter and develop Rustic Buiding skills.
Some are short exercises to help develop the rustic imagination.
Others are specific furniture projects. I've estimated time needed for each of these:
1. The Rustic Trophy Chair
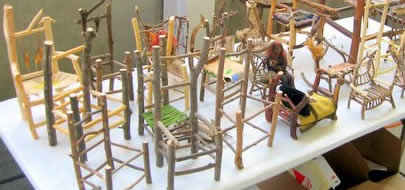
This is a very helpful activity to better understand the technical skills, delights and frustrations of working rustic. 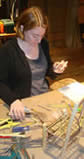
- A. This 12" model chair has 20 mortise and tenon joints-- the basic rustic contstruction method. So there's learning and practice making peg-in-hole joints with both hand and power tools.
B. This is an experience in selecting and designing with natural materials. You confront and develop your innate sense of design: What sizes, shapes, textures look "good" to you?
There are challenges to working with the curves of natural form materials and the forgiveness necessary as you encounter the mistakes inherent in the process.
C. This project uses my "Panel Method" -- the way I build larger chairs, bookcases, table bases and beds. First you make a back panel: design it, drill it out, fit the pieces, check it and glue it; then make the front panel, then put the panels together. This way somewhat minimizes the craziness or challenge of working with wood that is not straight.
D. This project is a comfortable, likely successful introduction to the details of Working Rustic. It's a good project for a Day Workshop. It takes 3 - 4 hours to get the first one of these done. The next ones can be done in about half the time.
E. The size of this project is attractive for people who want to try out some hand work or rustic work and may not have access to a dedicated workshop. It can be done almost anywhere, with a minimum of specialized tools. When I was doing this in a village in the Yucatan a few years ago, there were no drills and the women making the chairs used sharpened spoon handles to make the mortises.
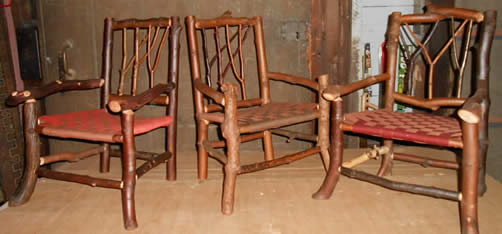
2. Larger Rustic Work
Larger rustic pieces use the same peg-in-hole (mortise and tenon) joinery. Scaling UP to larger firniture takes more material, larger material and different, bigger tools. It's also a little longer to tweak or fix a mistake.
In Decemnber, 2013, I finished a small production run of Children's Chairs. Each one of these took me about 11-12 hours from selecting the first sticks to sanding and oiling the wood and then weaving the seats:
The arms seem to take me an hour or two:
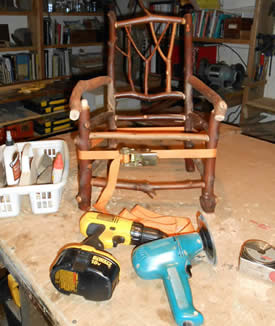
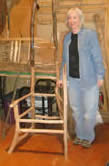
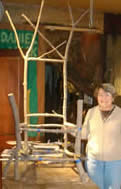
These two students spent about 10-12 hours getting these chair frames done.
A Headboard, with 10 BIG mortise/tenon joints took about 20 hours
3. Rustic Slab Table or Stool
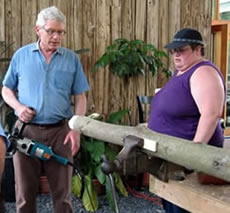
After you understand and practice the mortise and tenon joinery, this project has a certain attraction. There are usually only three or four joints to make to get the table or stool standing. Notice I say "standing". The process is pretty fast, then slow. First you find a nice slab of wood, then decide what it wants to be. Then you find three or four legs and put tenons on them that are 1 1/4" in diameter. This can be done with a hatchet or a tenon cutting attachment on a drill. Then you drill 1 1/4" holes in the bottomside of the slab.
Hopefully everything fits together. That's what Dan's there for!
This can be anywhere from a 2 to 5 hour process depending on the level of finish.